Introduction
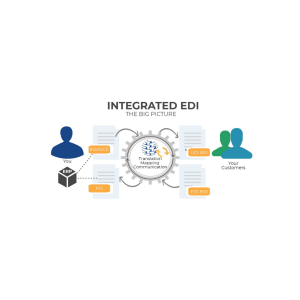
EDI NetSuite integration has become essential for over 40,000 organizations worldwide using this popular cloud ERP solution. We understand that connecting your NetSuite system with EDI capabilities can transform how your business exchanges critical data with trading partners. However, without a dedicated integration layer, many teams struggle with manual processes and delayed partner onboarding, especially during implementation.
By enabling automated, real-time data exchange across your entire supply chain, cloud EDI solutions minimize errors and save countless hours of manual effort. Additionally, integrating EDI with NetSuite’s accounting software offers significant advantages in financial planning and management. For fast-scaling businesses, NetSuite has become the go-to ERP platform thanks to its cloud-first design and flexible architecture.
In this step-by-step implementation guide, we’ll walk you through everything you need to know about successfully integrating EDI with your NetSuite environment, from defining your goals to monitoring and scaling your solution.
Key Takeaways
- Define clear integration goals by identifying key business processes for automation and aligning EDI workflows with existing NetSuite ERP modules
- Choose the right integration method between SuiteTalk/SuiteScript, iPaaS platforms, or prebuilt connectors based on your technical resources and complexity needs
- Prepare your NetSuite environment by enabling Web Services API access, configuring proper user roles and permissions, and validating data structures
- Implement robust testing protocols with trading partners and establish comprehensive error handling mechanisms before going live
- Monitor transactions through real-time dashboards and plan for scalable partner onboarding to ensure long-term success
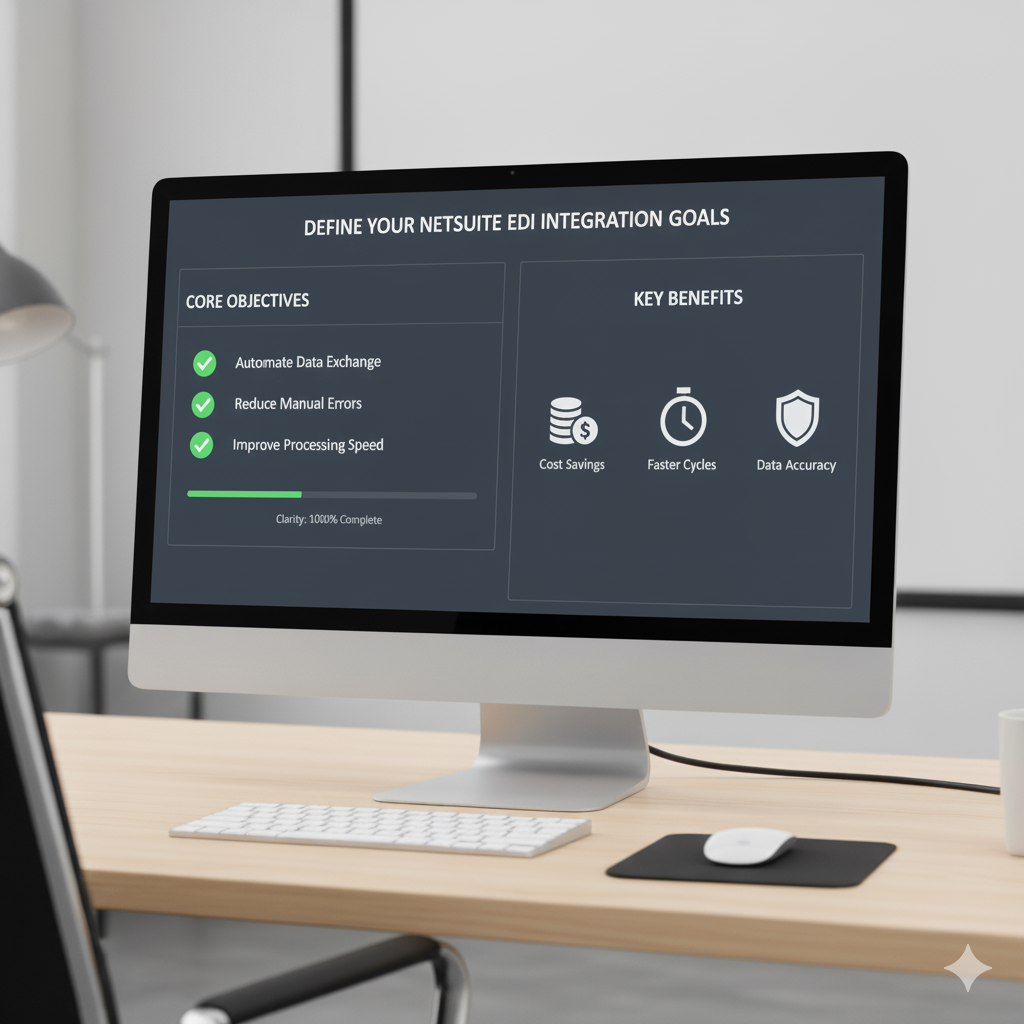
Step 1: Define Your EDI NetSuite Integration Goals
The foundation of successful EDI NetSuite integration fundamentally begins with defining clear objectives for your implementation. Before diving into technical configurations, businesses must establish precisely what they hope to achieve through automation. This critical first step ensures your integration aligns with organizational needs while maximizing return on investment.
1. Identify key business processes for automation
Begin by conducting a thorough analysis of your current business requirements to determine specific EDI processes needed for integration. This analysis phase is crucial as it represents the primary stumbling block in most EDI and ERP implementations. Focus on processes that currently involve manual data entry or create bottlenecks in your operations:
- Order-to-cash workflows (sales orders, invoices, shipping notices)
- Procure-to-pay processes (purchase orders, receiving documents)
- Inventory management and warehouse operations
- Financial document exchange and reconciliation
By automating these business documents, you eliminate manual data entry while ensuring consistency across all trading partner relationships. Moreover, understanding which specific business processes you aim to enhance through integration paves the way for smoother implementation and sustainable growth.
2. Align EDI workflows with NetSuite ERP modules
Once key processes are identified, map how these workflows will interact with your existing NetSuite environment. Proper data mapping between NetSuite and your EDI system is essential, particularly when dealing with various data formats and structures.
Design automated workflows that streamline operations across systems. For instance, when an EDI order arrives, your integration should trigger automatic updates in NetSuite to adjust inventory levels and initiate fulfillment processes without manual intervention. This end-to-end automation ensures real-time ERP updates, enabling faster processing and more accurate downstream workflows.
Furthermore, consider how your EDI solution will adhere to standards such as X12, EDIFACT, or JSON to prevent data discrepancies and regulatory compliance issues. Your integration approach should embed EDI capabilities directly within NetSuite, replacing fragmented processes with unified, real-time workflows that reduce reliance on external systems.
3. Set Measurable Success Criteria for Integration
Establishing concrete metrics helps track integration effectiveness and justifies your investment. Primarily focus on three key benefit areas:
- Cost Savings: Quantify expected reductions in manual processing costs, supplies, labor, and error-related expenses. Automation minimizes errors that lead to delays and inefficiencies, ultimately resulting in better profit margins.
- Operational Efficiency: Set targets for transaction processing times, error reduction rates, and staff productivity improvements. Measure how automating document exchange saves time and provides real-time data access for faster decision-making.
- Trading Partner Relationships: Track improvements in communication accuracy and timeliness with partners. Strong relationships foster mutual success and enhance your company’s reputation in the marketplace.
Utilize analytics dashboards offered by your cloud EDI provider to monitor these metrics consistently. Verify that your solution offers sufficient scalability and flexibility to accommodate future growth and evolving business requirements. Ultimately, aligning technology capabilities with business objectives creates the solid foundation necessary for successful implementation.
Step 2: Choose the Right EDI NetSuite Integration Method
Selecting the appropriate integration method forms the backbone of your NetSuite EDI implementation strategy. Since NetSuite doesn’t include built-in EDI capabilities, understanding the available approaches becomes crucial for successful deployment. Let’s examine your options and their implications for your business needs.
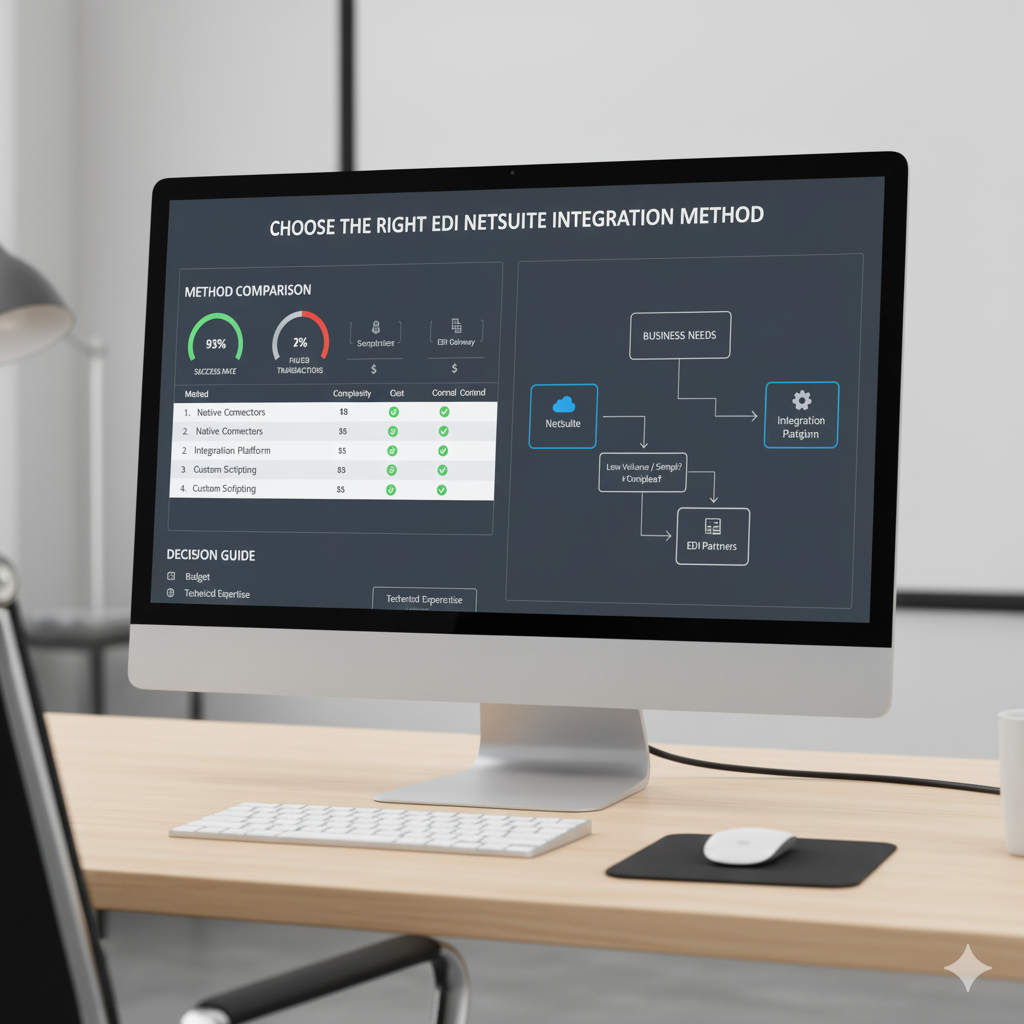
1. SuiteTalk vs SuiteScript for NetSuite EDI
These two native NetSuite technologies offer distinct approaches to EDI integration. SuiteTalk is a web service integration tool that connects NetSuite with third-party applications using any programming language. It provides real-time data integration, built-in support for NetSuite ERP and CRM integrations, plus advanced security features.
Conversely, SuiteScript is a JavaScript-based platform enabling customization and automation of business processes. It works alongside SuiteTalk by instructing when to request data, where to call it from, and how to process it once it reaches NetSuite. When comparing their capabilities:
SuiteTalk SOAP web services require more calls to accomplish a business flow, whereas RESTlets (a SuiteScript implementation) can handle all actions for a business flow in one call, making them highly efficient for specific needs. RESTlets also support JSON and XML content types, while SOAP web services primarily use XML.
2. Using iPaaS Platforms for Cloud EDI Integration
Integration Platform as a Service (iPaaS) provides a middle ground between custom and pre-built solutions. These platforms offer various integration tools and connectors, enabling connections between NetSuite and multiple third-party applications without extensive coding.
iPaaS advantages include flexibility to create custom integrations between various software applications, user-friendly guided integration processes, and scalability as your business grows.
Nevertheless, iPaaS platforms typically require annual subscription fees and may have limitations in customization compared to fully custom solutions.
3. Prebuilt Connectors vs Custom-Built Solutions
Each approach offers distinct advantages depending on your business requirements and resources.
Custom integration provides complete control over the integration process, allowing you to design solutions matching your exact specifications and complex workflows. It offers fine-grained control over data mapping, transformation, error handling, and security. However, this approach requires significant time, resources, specialized technical expertise, and higher upfront costs.
Pre-built integrations (out-of-the-box connectors) deploy faster—often within minutes or hours—and are generally more cost-effective than custom development. They feature intuitive interfaces and simple setup processes requiring minimal technical expertise. The downside includes limited customization options and potential compatibility issues with specific software applications.
For most businesses, the decision comes down to:
- Integration complexity and unique requirements
- Available technical resources and expertise
- Implementation timeline requirements
- Budget constraints (upfront vs. ongoing costs)
Commport EDI Solutions offers easy integration with all major ERPs, including NetSuite and other backend systems. Our affordable and scalable EDI solution comes with 100% EDI compliance guaranteed, making it an excellent option for businesses seeking reliable NetSuite EDI integration without excessive complexity.
Ultimately, your integration method should align with your defined goals from Step 1, considering both immediate implementation needs and long-term scalability requirements as your trading partner network expands.
Step 3: Prepare Your NetSuite Environment
Proper preparation of your NetSuite environment forms the critical foundation for successful EDI integration. Before data can flow seamlessly between your ERP and trading partners, several key configurations must be implemented within your NetSuite instance. Let’s walk through the essential setup steps to ensure your environment is properly configured for EDI implementation.
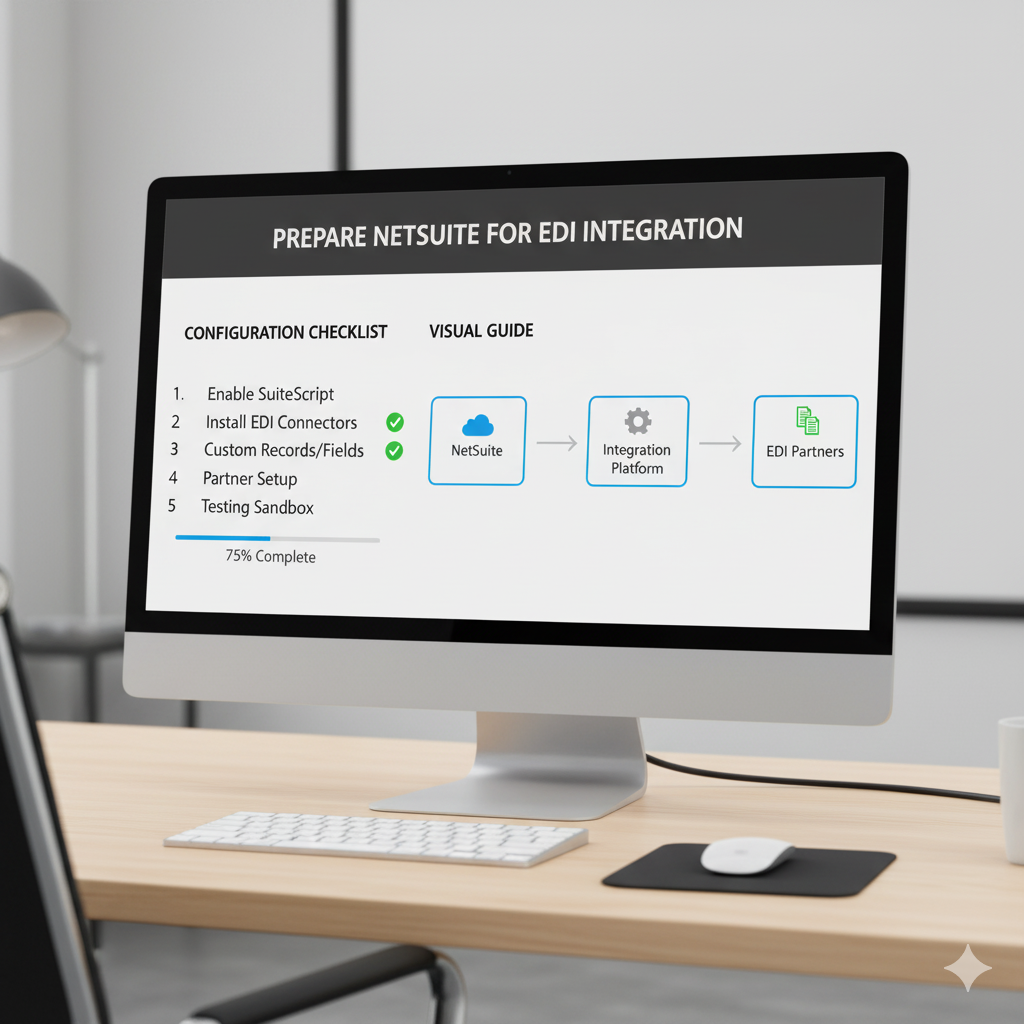
1. Enable Web Services and API access in NetSuite
Since NetSuite lacks built-in EDI capabilities, your integration will rely on external connections through NetSuite’s API framework. First, you’ll need to determine which API approach best suits your integration needs:
- SOAP (Simple Object Access Protocol): Traditional web service protocol that handles complex transactions but requires more calls to complete business flows
- REST-based APIs: Often preferred by modern developers due to their familiarity and efficiency in handling complete business flows in a single call
To begin enabling these services, log in as an administrator to activate the necessary Web Services features. Subsequently, generate API credentials that your EDI solution will use to authenticate and communicate with NetSuite. These credentials must be securely stored and properly configured in your integration platform.
2. Configure User Roles and Permissions for EDI
NetSuite’s security model operates on the principle of least privilege, ensuring users only access what they need to perform their jobs. Accordingly, you’ll need to create or modify roles specifically for EDI operations:
- Navigate to Setup > Users/Roles > User Management > Manage Roles
- Either create a new role or customize an existing one by clicking Edit or Customize
- On the Permissions subtab, set appropriate access levels:
- View: Users can only see existing data
- Create: Users can create new records
- Edit: Users can modify existing data
- Full: Users have complete access (view, create, edit, delete)
For EDI-specific functions, ensure your roles include permissions for transaction processing, record creation, and web services access. Remember that newly enabled features in NetSuite require updating custom roles with corresponding permissions.
3. Validate NetSuite Data Structures for EDI Mapping
Prior to implementing EDI workflows, verify that your NetSuite data structures align with standard EDI document formats. Your business must ensure proper mapping between NetSuite and the EDI system while maintaining various data formats and structures.
For specific EDI documents like the 856 (Advanced Shipping Notice), you’ll need to activate relevant system rules:
- Using the WMS Warehouse Manager role, navigate to WMS Configuration > Configure Warehouse > System Rules
- Find the Generate EDI 856 outbound ASNs? rule
- Click Edit to activate for all warehouse locations or New WMS System Rules for specific locations
- Set the Rule Value to Y and check the Active box
In addition, on customer records, specify whether specific customers require advanced shipment notices. This configuration ensures your EDI integration properly generates the required documents based on trading partner requirements.
Throughout this preparation phase, maintain detailed documentation of all configurations, role permissions, and data mapping decisions to facilitate troubleshooting and future enhancements to your NetSuite EDI integration.
Step 4: Implement and Test the EDI NetSuite Workflows
After preparing your NetSuite environment, the next critical phase involves implementing and testing your EDI workflows. This stage transforms your planning into operational reality as you configure data mappings, validate integrations with trading partners, and establish robust error handling mechanisms.

1. Map EDI Documents (850, 810, 856) to NetSuite Records
Effective mapping forms the core of any successful EDI NetSuite integration. Each supported EDI transaction requires careful configuration:
- EDI 850 (Purchase Order): Maps to NetSuite sales order records
- EDI 810 (Invoice): Corresponds to NetSuite invoice transactions
- EDI 856 (Advance Ship Notice): Links to NetSuite item fulfillment records
First, clone a base flow for each transaction type into specific partner flow groups. Next, assign appropriate EDI profiles (like Costco 4010 or Target 4030) according to your trading partners’ requirements. Then, map parsed EDI JSON fields to their corresponding NetSuite record fields using the visual interface of your integration platform.
2. Perform Integration Testing with Trading Partners
Once mapping is complete, rigorous testing becomes essential before deploying to production. Testing should occur in a controlled environment that mimics your production setup. Consider various scenarios, including:
- Standard document processing flows
- Edge cases with unusual data combinations
- Error conditions and recovery procedures
This validation phase ensures your integration performs reliably across different transaction types and partner requirements.
3. Setup Error Handling and Logging Mechanisms
Establish robust error management systems to quickly identify and resolve integration issues. When using asynchronous workflow tasks, NetSuite automatically sends error details to workflow owners via email. These notifications include:
- Workflow name in the subject line
- Internal record ID and specific error message in the body
- Comprehensive details for troubleshooting
For the first five errors in a workflow, NetSuite sends individual emails. If more than five errors occur, it waits until processing completes, then sends all errors in a single message.
Additionally, implement real-time execution tracking that shows which steps succeeded or failed and how long each phase took. Field-level error diagnostics tied directly to EDI segments eliminate guesswork in troubleshooting. Finally, ensure your solution provides the ability to reprocess failed flows directly from dashboards after corrections—without manual file reloads.
Step 5: Monitor, Maintain, and Scale the Integration
Once your NetSuite EDI integration is operational, effective monitoring and management become essential for long-term success. Consistent oversight allows teams to identify potential issues before they impact business operations or trading partner relationships.
1. Use Dashboards for Real-Time EDI Transaction Tracking
Effective monitoring begins with comprehensive visibility into your EDI operations. Modern EDI platforms provide real-time dashboards and alerts for tracking transactions, failures, and partner-specific compliance issues. Through these tools, operations teams gain immediate control over partner configurations and transaction mappings without waiting on support tickets.
Field-level error diagnostics tied directly to EDI segments (such as invalid N1 or missing DTM) eliminate guesswork when troubleshooting issues. Furthermore, integrated monitoring tools reduce troubleshooting time, support audit readiness, and eliminate the need for custom scripts or third-party solutions.
2. Plan for Onboarding New Trading Partners
As your business expands, a scalable approach to partner onboarding becomes crucial. Utilizing prebuilt templates and reusable profiles significantly accelerates the integration of new trading relationships. Partner profiles managed in a shared catalog—including predefined EDI schemas, connection settings, and version tracking—simplify this process while maintaining consistency.
Your selected EDI solution must align with future business needs, including expansion into global markets with different EDI standards. This forward-thinking approach helps avoid costly replacements as your organization evolves.
3. Ensure Compliance with Evolving EDI Standards
NetSuite EDI workflows support connections with multiple trading partners using different EDI standards simultaneously. Through a centralized dashboard, you can manage various formats, protocols, and partner-specific requirements while maintaining compliance across suppliers, customers, and logistics providers.
Proactive monitoring protocols detect anomalies in system performance, transaction throughput, and error logs. Automated alerts facilitate timely troubleshooting and resolution, ultimately preventing compliance issues that could disrupt your supply chain.
By implementing these monitoring and maintenance practices, you’ll maximize the benefits of your NetSuite EDI integration while minimizing potential challenges and disruptions.
Bonus: How to Configure NetSuite WMS
You can optionally choose to configure NetSuite WMS for use with EDI if you are working with a NetSuite EDI partner to send advance shipping notices (ASN) to customers after items are shipped.
NetSuite WMS creates custom records with the required shipping data.
This data is then read by the NetSuite EDI partner, who converts the data into an EDI document and sends the ASN to the customer. For more information, see Confirming Customer Shipments.
Configuring the EDI integration is a two-step process: you must first enable the EDI system rule and then identify which customers or orders require an ASN when orders are shipped.
Generating SSCC-18 Bar Codes
You can generate SSCC-18 bar codes in GS1 linear format for customers that require advanced shipment notices. To set up, define the format and provide your company prefix or DUNS. The generated bar codes appear on shipping labels after you pack items through NetSuite WMS.
For more information and setup instructions, see Defining a UCC Code Format.
Activating the EDI System Rule
To begin your EDI integration setup, activate the Generate EDI 856 outbound ASNs? Rule.
To activate the EDI system rule:
Using the WMS Warehouse Manager role, go to WMS Configuration > Configure Warehouse > System Rules.
On the WMS System Rules List, do one of the following:
To activate the rule for all warehouse locations, next to the Generate EDI 856 outbound ASNs? rule, click Edit. Then, proceed to Step 3.
To edit or activate the rule for a specific location, click New WMS System Rules. Then, set values in the following fields:
Name – Enter Generate EDI 856 outbound ASNs?
Location – Select a warehouse location to which you want to apply the rule.
In the Rule Value field, enter Y.
Check the Active box.
Click Save.
Setting Up Customers to Receive Advanced Shipment Notices
On a customer record, you can specify whether a customer requires advanced shipment notices.
To identify which customers require ASNs:
Using the WMS Warehouse Manager role, go to WMS Configuration > Configure ERP Records > Customers.
Click Edit next to the customer that requires an ASN when an order is shipped.
Check the ASN Required? box.
Click Save.
Conclusion
Implementing EDI integration with NetSuite represents a significant step forward for businesses seeking to streamline their supply chain operations. Throughout this guide, we have outlined the five essential steps that form the backbone of successful implementation—from defining clear goals to monitoring and scaling your solution. Each phase builds upon the previous one, creating a comprehensive framework for automating data exchange across your entire organization.
The benefits of properly executed NetSuite EDI integration extend far beyond simple automation. Businesses that follow this implementation roadmap can expect significant reductions in manual processing time, dramatically fewer data entry errors, and substantially improved trading partner relationships. Additionally, the real-time visibility provided by integrated dashboards enables proactive management of your entire supply chain ecosystem.
Your choice of integration method will undoubtedly impact both immediate implementation success and long-term scalability. Whether you opt for SuiteTalk, SuiteScript, an iPaaS platform, or a combination approach, the key lies in aligning technology decisions with your specific business requirements. Businesses seeking an affordable and scalable solution should consider Commport EDI Solutions, which offers easy integration with NetSuite and other major ERPs while guaranteeing 100% EDI compliance.
Remember that proper preparation of your NetSuite environment forms the foundation for success. User roles, permissions, and data structures must align perfectly with your integration strategy before implementation begins. Likewise, thorough testing with actual trading partners helps identify potential issues before they impact your operations.
The final piece of the puzzle involves ongoing monitoring and maintenance. EDI standards evolve, trading partner requirements change, and business needs expand—making scalability a critical consideration for any implementation. A flexible, future-proof approach ensures your NetSuite EDI integration continues delivering value as your organization grows.
After all, successful EDI integration transforms not just how you exchange data, but how your entire business operates. The automation, accuracy, and efficiency gained through this process position your company for sustainable growth in an increasingly complex supply chain landscape.
Commport EDI NetSuite Integration Services
Need Help? Download: Commport's EDI Buyers Guide
Unlock the full potential of your supply chain with our comprehensive EDI Buyer's Guide — your first step towards seamless, efficient, and error-free transactions
Frequently Asked Questions
NetSuite EDI integration streamlines supply chain operations by automating data exchange, reducing manual processing time, minimizing data entry errors, and improving trading partner relationships. It also provides real-time visibility into transactions, enabling proactive management of the entire supply chain ecosystem.
The choice depends on your specific business needs, technical resources, and complexity requirements. Options include using SuiteTalk or SuiteScript (NetSuite’s native technologies), leveraging iPaaS platforms, or implementing pre-built connectors. Consider factors such as customization needs, implementation timeline, and budget constraints when making your decision.
Key steps include enabling Web Services and API access in NetSuite, configuring user roles and permissions specific to EDI operations, and validating NetSuite data structures to ensure proper mapping with standard EDI document formats. Proper preparation forms the foundation for successful integration.
Implement proactive monitoring protocols to detect anomalies in system performance and transaction throughput. Use centralized dashboards to manage various EDI formats, protocols, and partner-specific requirements. Regular updates and maintenance of your EDI solution will help ensure ongoing compliance across your trading network.
Focus on implementing a flexible, future-proof approach that can accommodate new trading partners and evolving business needs. Look for solutions that offer prebuilt templates and reusable profiles to accelerate partner onboarding. Additionally, ensure your chosen EDI solution can support expansion into global markets with different EDI standards.